How to Manage Your Member Account
How to Manage Your Member Account
This tutorial will take you through the steps of editing your Member Profile through the editing interface on the directory website on which it is displayed. You will learn how to properly edit the following: the text seen on your account page, uploading your logo, adding staff profiles, displaying special deals that you offer, adding videos to your account and uploading photos
Contents
Login, Editing Text and Uploading Logo
Login: To get started you must login. The login link can usually be found on every page of the website, somewhere near the top of the site. You have already set up your account and have been given a password and a username. If you cannot remember your login credentials, you can follow the link ‘forgot password.’ Enter your login credentials to get started editing your account.
Text Editor: The WYSIWYG text editor allows you to manually add and edit the text for your member account. You can easily edit the style, size and positioning of your text.
A. If you already have text from another source and simply need to paste it into the text editor, always use the Paste as Text icon. ![]()
Text editor software, such as Microsoft Word, often attaches invisible formatting code to text that is copied from it, which can cause formatting issues when used on a website. By clicking on this icon and pasting your text into the box, formatting and styles from external programs will be stripped off. This will leave you with clean text that will be easy to handle in the WYSIWYG editor.
B. If you would like to create a link to another web page, use the Insert Hyperlink icon. ![]()
Simply highlight the text you want to link, and then click on the Insert Hyperlink icon. Then, in the box that appears, enter the exact URL you’d like to link to.
After any changes have been made, remember to click on the Update Profile button below the WYSIWYG text editor. This will save all changes. To see how your profile is looking thus far, you can click the "View Profile in New Window" link after every section of the profile editor - this will open your profile in a new tab or window without closing your profile editor window.
Uploading Your Logo: The logo Upload button is located on the left of the WYSIWYG text editor. Press the button and navigate to your logo on your computer. The image must be between 150 X 150px and 300 X 300px and no more than 80kb. The image will automatically be resized down to 150 X 150px.
Updating Staff Profiles
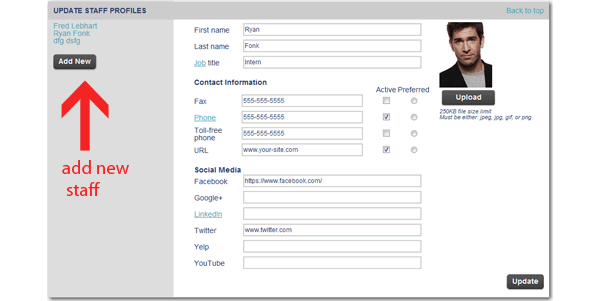
To get started adding staff, select the Add New button, which is located to the left of the staff section.
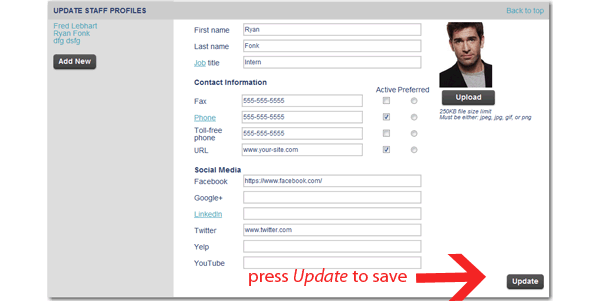
Fill out the form. You must add a first name, last name and job title. The rest of the form is optional. Once all information is completed, select the Update button below the form.
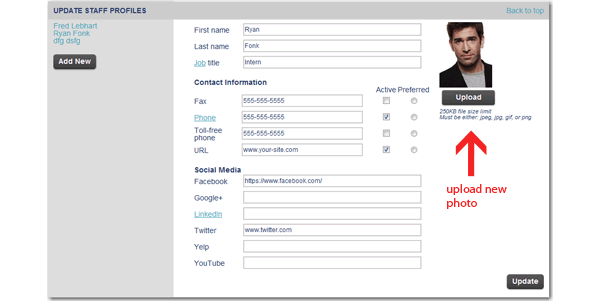
You will then be able to upload an image. Located to the right of the staff section you will see the Upload button. Please select this button and navigate to the proper image located on your computer.
Updating Your Deals
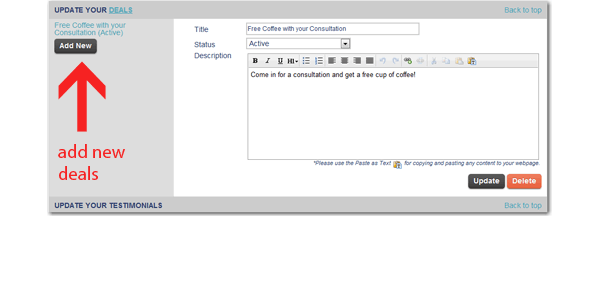
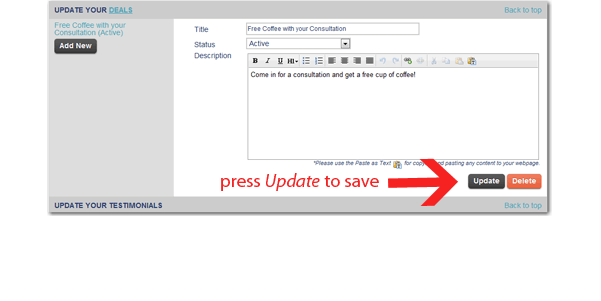
To add a new deal to you account page you must first click the Add New button
Give your deal a title. Next you will be able to adjust the status of your deal. Active deals will be displayed on your profile page. Inactive deals will not be seen on your profile, but they will be saved, in case you want to display them at a later date. Give your deal a description. You will be using the same WYSIWYG editor as in the Text Editor tutorial listed in section 1. Please refer to section 1 for instructions on how to paste in new content and to set up links. Then press Update to save.
Uploading Videos
To upload a video please go to YouTube and go to the video that you desire to be on your profile. To upload the video, you will need to get the YouTube Video ID.
Once you have the correct ID, paste the text into the YouTube ID text field and press Update.
Update Your Gallery
Updating your gallery will allow you to have current images of your business on your profile page. Simple press Upload and navigate to your images on your computer.

