Payments (v2)
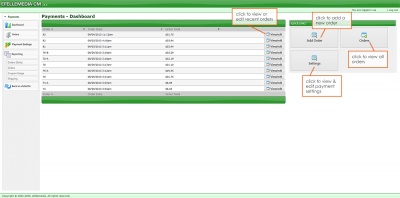
The Payments Module ties with the CRM and allows you to view order history, capture/void payment authorizations, refund order amounts, create shipment confirmations, track shipment info and create/view log notes (private and/or public).
Contents
Orders
Order Management
The Order Management screen is an overview listing all the orders currently in the system. From this screen you'll be able to find a specific order using the filters, quickly see each order's status, or cancel an existing order. Click the View/edit button on the order line to view more information about that order.
Order Statuses
- Pending Capture - The order has an authorized payment awaiting capture.
- Pending Shipment - The order just needs to be marked for shipment.
- Pending Capture/Shipment - The order has most likely just been placed and holds the requirements of the above two statuses
- Captured/Shipped - The order is considered 'complete' at this time.
- Voided - The authorization has been voided. The order can still be edited, but another authorization and capture is required to collect payment.
- Canceled - The order has been canceled (and authorization voided if applicable). No more actions can be taken on this type of order.
- Archived - This is a special status for when an order has either failed mid-process of saving or has been edited and is now just a copy of a previous state. No more actions can be taken on this type of order.
- On Hold - A transaction held for review by Authorize.net's Advanced Fraud Detection Suite (AFDS) will be held for either 30 days if the AFDS filter is set to "Authorize and hold for review" the transaction will authorize as normal and you will have 30 days in which you can choose to approve it, but it is recommended that you take 72 hours to approve or void the transaction.
View Order
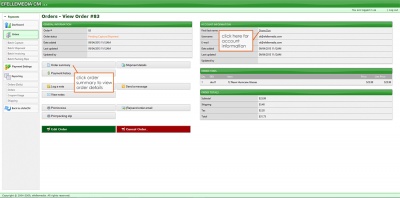
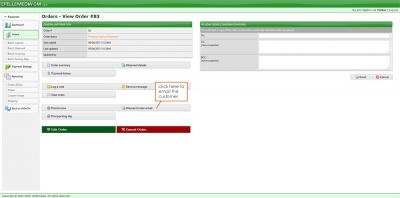
By clicking the View/edit button, you'll be able to view a complete record of the order in the Order Detail Page. Once you've entered the Order Detail Page, use the buttons on the left of the to view various aspects of the full order record.
Order Summary
Order Details
- CRM account > Account Holder's name
- Order Statuses
Pending capture (authorized). Once an order has been placed the order total is considered as being authorized. This means that a hold has been placed on the customer's bank account for the order total.
Pending Shipment. An order can be marked as shipped at any time during the process, but is usually done after the authorized order total has been captured.
Complete. An order has been captured and marked as shipped. These orders won't show up on the Main Order Overview screen.
Voided. Orders that have been cancelled (authorized order total is negated). Voids can only be done on authorized order totals. If you want to cancel an order after the order total has been captured, you will need to refund the order total. These orders won't show up on the Main Order Overview screen.
- Order Placed > shows date and time of when order was placed.
- Last Updated Place > shows date and time of when changes were last made on an order.
Order Items
List of corresponding price and items included in the order.
Order Totals
Shows Order Totals, Promotional Discounts, Tax & Shipping charges.
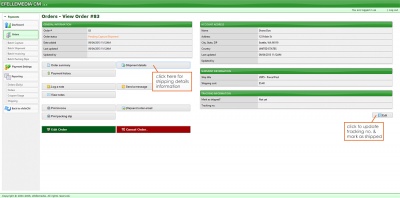
Shipment Details
Shipping Address
Contains name and address information.
Shipping Information
Ship type - Shipping carrier (e.g. UPS, USPS, or FedEx)
Subship type - Shipping service (i.e. Ground, 2 Day Air, etc..)
Tracking Information
Marked as shipped? - will show the date when the first shipment confirmation went out.
Tracking no. - shows carrier tracking number for reference.
Tracking details - will show shipment log (in development).
Update Tracking No.
Tracking no. - add shipment tracking number.
Tracking number is a required field. You can also update the tracking number if it changes.
Send eMail confirmation
Check box if you wish to send eMail to account holder.
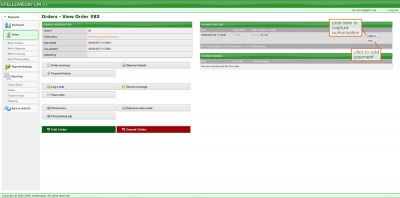
Payment History
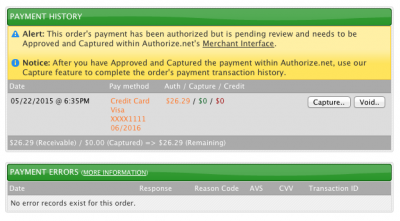
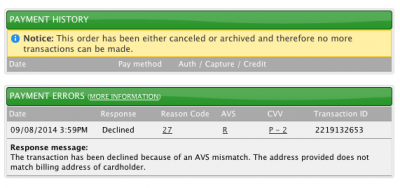
Allows you to see when payment was made, credit card information, status of payment and whether or not there are any payment errors within the account.
On Hold
A transaction held for review by Authorize.net's Advanced Fraud Detection Suite (AFDS) will be held for either 30 days if the AFDS filter is set to "Authorize and hold for review" the transaction will authorize as normal and you will have 30 days in which you can choose to approve it, but it is recommended that you take 72 hours to approve or void the transaction.
If the order is marked as On Hold, then you will need to log into your Authorize.net Merchant account to either approve or void the transaction. After doing so come back to the CMS and set the order to Captured or Voided to finalize the payment record.
Log A Note
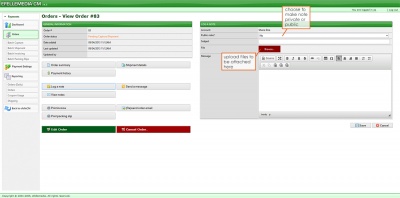
You can use this feature to log "internal" or "public" notes. Internal notes will only be visible to the CMS user. Public notes will be visible to both CMS user and Account holder. You can also upload a file (e.g. pdf, image, etc...) to be included within your note.
Notes will be added to the Notes Log section (see below).
Send A Message
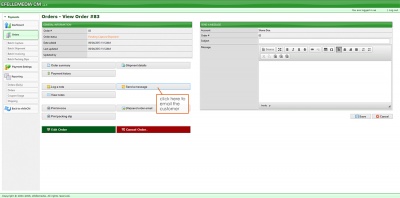
You will need the account holders e-mail address in order to send a message. Keep in mind that unlike log a note, sending a message does not allow you to include files or docs with your message.
View Notes
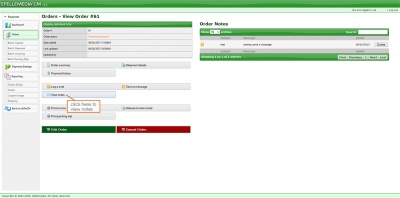
Allows you to see history list of notes logged into an account/order.
Filter past logs by note description, date, and author. If an attachment exists, click the icon for a pop-up preview.
Print Invoice
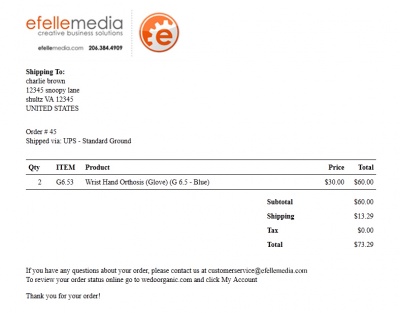
Click to print an invoice for the order.
Custom templates upon request.
Print Packing Slip
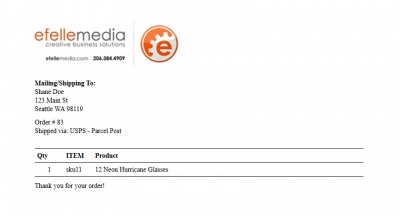
Click to print a packing slip for the order.
(Re)send Order Email
This allows you to re-send the order confirmation e-mail to the account holder if needed.
Edit Order
Clicking this button will take you to the Edit Order interface. This action is only available for orders that are not under the Canceled or Archived status.
Cancel Order
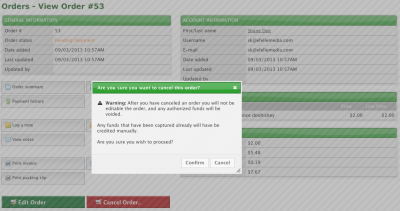
Clicking this button will first bring up a confirmation request. After confirming if there is a pending authorization the payment will be voided and the order will be placed under the Canceled status. No further actions can be taken on this order.
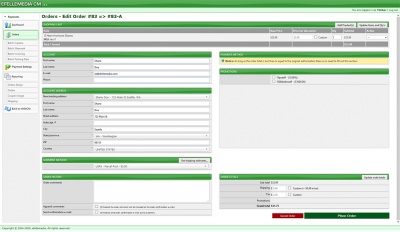
Add/Edit Order
To ensure that the order is processed correctly and completely, please follow the steps below in order.
- Select an Existing Account or Create a New Account
- Prepare the Shopping Cart
- Select an Existing Address or Create a New Address
- Select a Payment Method
- Select a Shipment Method
- Apply Promotion(s)
- Notes & Confirmation
- Confirm Order Totals
Select an Existing Account or Create a New Account
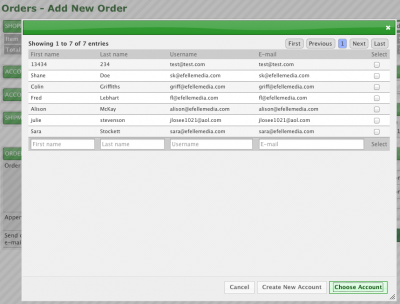
The Accounts window will pop-up immediately upon arriving at the Add Order screen. If you see the account you are looking for, select that account and then click Choose Account. If an account is not in the system yet, click Create New Account.
The window will close and you will have the ability to either update the existing account information or add new information.
Prepare the Shopping Cart
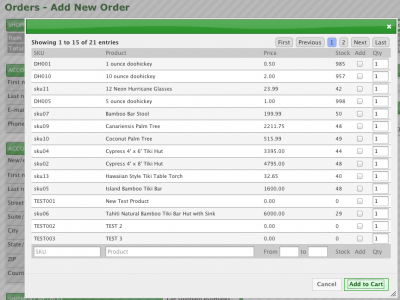
Click on the Add Product(s) button to bring up the Products Catalog window. This will provide a full list of your product catalog, including products that are out of stock (Notice: products with size/color options are broken down into separate rows). Once you have selected some products click the Add to Cart button.
You will now see all the products listed in the Shopping Cart. You can add more products at any time. If you make any update to the quantity or price remember to click the Update Items and Qty's button to update the Cart Total.
If you wish to remove a product from the Shopping Cart select Remove from the drop-down on the product row and then click the Update Items and Qty's button to update the Shopping Cart.
Select an Existing Address or Create a New Address
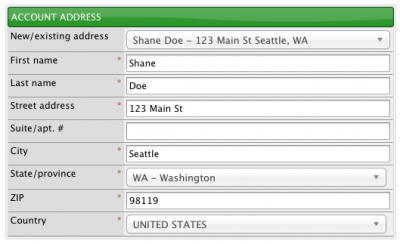
If you have selected an existing account some existing addresses may be available for selections, but if not then you will have to create a new address record. Fill in the address record completely then continue on.
Select a Payment Method
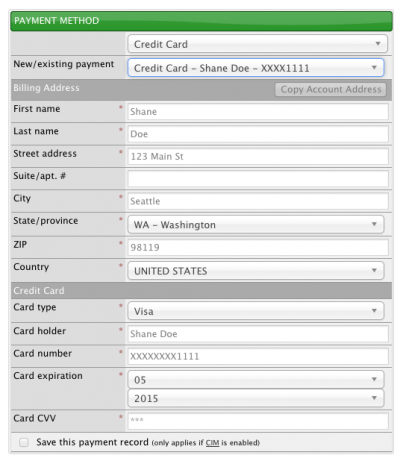
Select the appropriate payment method. If you have selected Credit Card then you can either select an existing Credit Card (Authorize.net CIM required) or enter a new one. Saving a credit card record requires Authorize.net CIM featured to be enabled.
Select a Shipment Method
Once the two following requirements are met you can access this section:
- At least one item exists in the Shopping Cart.
- The Account Address form has been filled out completely.
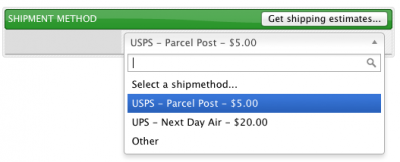
Click the Get Shipping Estimates button to generate a list of shipping options along with their price. Then select the shipping option that best fits this order.
Warning: If you make any changes to the Shopping Cart you may need to re-generate the available shipment methods.
There is an Other option, which will allows for a custom shipment method (enter a custom title).
Apply Promotion(s)
Select the promotion codes you would like to use on the order. The deducted amount will appear in the Order Totals section.
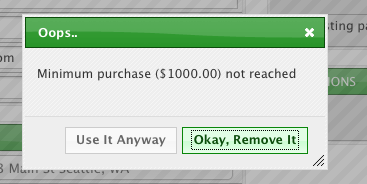
If the promotion code has requirements that aren't met you will get a warning pop-up. You can choose to use the promotion or cancel it.
Notes & Confirmation
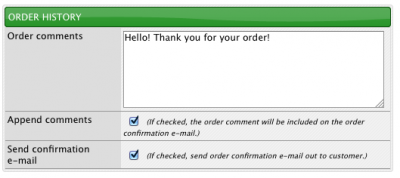
Before processing the order, you can add a note to the order record. There are also two check boxes below the notes field:
- Append comments - If checked, the notes you've added above will appear on the confirmation e-mail.
- Send confirmation e-mail - If checked, you and the customer will receive an order confirmation via e-mail (you can send additional confirmation e-mails after the order has been placed).
Confirm Order Totals
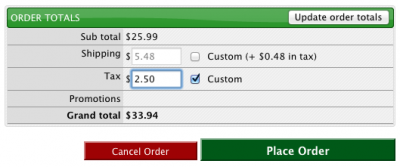
Once you have filled out all the sections it's time to confirm the order totals. Click the Update order totals button to re-calculate the order totals. Afterwards you will have the option to change the shipping and tax prices. (Note: clicking the Update order totals button again won't reset your custom shipping and tax prices if they are set.)
Order Errors
Response Codes
Overall status of the transaction
- 1 = Approved
- 2 = Declined
- 3 = Error
- 4 = Held for Review
Response Reason Codes
Please refer to this link for more information. Enter in the code you were provided and click Submit.
If you receive:
- Response Reason Code: 2
- Response Reason Text: This transaction has been declined.
This is the most basic error response and the payment gateway couldn't provide anymore information. Take the following steps if you get this error:
- Log into the Merchant Interface at https://account.authorize.net/.
- Click Search from the main toolbar (or Search by Batch from sidebar).
- Enter the order Transaction ID into the form and click Search.
- From the Search Results screen click on the transaction record.
- You may find more information under Transaction Status.
- If this is not helpful in determining the error as a last resort, you may need to contact your bank to see if they have any information.
AVS Response
Address Verification Service (AVS) response codes
- A = Address (Street) matches, ZIP does not
- B = Address information not provided for AVS check
- E = AVS error
- G = Non-U.S. Card Issuing Bank
- N = No Match on Address (Street) or ZIP
- P = AVS not applicable for this transaction
- R = Retry – System unavailable or timed out
- S = Service not supported by issuer
- U = Address information is unavailable
- W = 9 digit ZIP matches, Address (Street) does not
- X = Address (Street) and 9 digit ZIP match
- Y = Address (Street) and 5 digit ZIP match
- Z = 5 digit ZIP matches, Address (Street) does not
AVS Notes
AVS responses B, E, G, N, R, S, U are the default payment gateway AVS settings. When one of these AVS codes is returned, transactions are automatically rejected by the payment gateway unless you modify the default settings in the Merchant Interface.==
To configure transaction rejection settings based on the AVS response code:
- Log into the Merchant Interface at https://account.authorize.net/.
- Click Account from the main toolbar.
- Select Settings.
- Click Address Verification Service in the Security Settings section.
- Select the check box(es) next to the AVS codes for which the payment gateway should reject transactions.
- Click Submit.
Note: In order to use AVS, you must require the billing address and ZIP code when collecting payment information from your customers. Please contact your Web developer or software provider to confirm that your credit card processing software requires this information.
AVS Tips
- AVS code N (neither the street address nor the ZIP code matches) is the most fundamental AVS check. If you implement only one AVS rejection setting, this should be it.==
- If N is deselected, then the following settings should also be deselected: B, E, G, R, S, U. These responses mean that the address could not be verified by the card issuer. If you are not rejecting transactions when there is a legitimate AVS mismatch (N), then it is unnecessary to reject transactions that could not be verified with the issuer.
- To avoid errors when accepting prepaid debit cards or gift cards (stored-value cards with a Visa, MasterCard, Discover, or American Express logo), you will need to disable the U filter setting. For this type of transaction, the actual customer's billing address often is not associated with the gift card, or does not exist on file at the issuing bank.
- Not all banks outside the United States will return the G, U and S response codes. Therefore, this code is not absolutely effective for limiting suspicious transactions from outside of the United States.
- If you want to accept International payments, you must deselect the G, U and S response codes.
- Code Y (both the street address and the first 5 digits of the ZIP code match) is the desired responses in most cases. This setting should never be selected for rejection.
(Source, Source & More Information)
CVV Response
Card Code Verification (CCV) response codes
- M = Match
- N = No Match
- P = Not Processed
- S = Should have been present
- U = Issuer unable to process request
