CRM
Customer Relationship Manager is a mainly, view-only, CMS module that ties all site activities to a system account. For example, an account may have registered for an event via the Scheduling(v3) module, purchased an item through the CommerceFusion module, or made contact through one of the forms created on the Form Builder
Contents
Dashboard
The most recent content will show on the dashboard including statistics about Accounts and Quick Links to actions of the CRM.
Accounts
Add an Account
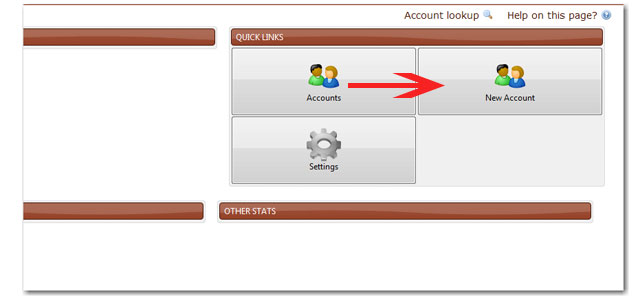
Please click into the CRM module. You will see "New Account" inside the quick links on the right side of the page.
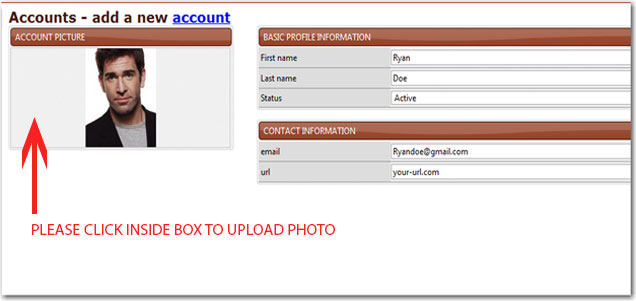
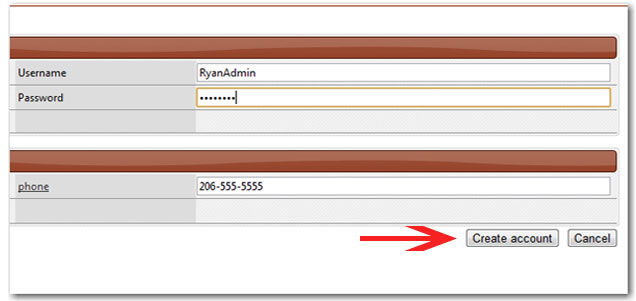
You can now add all of the account information and upload a photo. Please add the account user's first and last name. Add a username and a password, these will be used to log into the front-end of the website. Please set your status to active - an inactive account user will be unable to log in on the website.
To upload and image, please click into the gray box that is labeled "Account Picture." Follow the prompts to the location of your desired photo saved on your computer.
When all of your account information is updated and you have the correct image uploaded, please click "Create account" to save your information.
You will now have an account and be able to log into the website.
Duplicate usernames
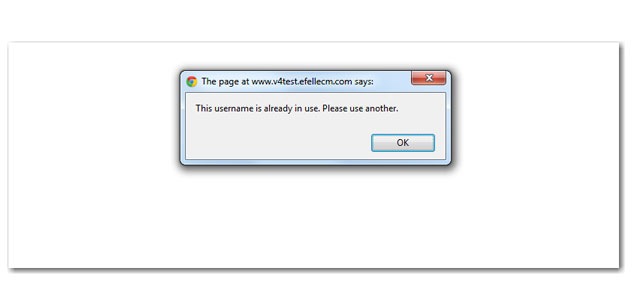
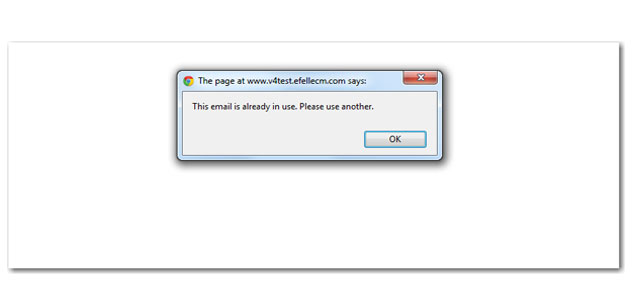
Using a duplicate username is not allowed. A pop up window will show you that you have selected an username that is already in use. If you get this warning message, please change your username.
Duplicate email addresses
Using a duplicate email address is not allowed. A pop up window will show you that you have selected an email address that is already in use. If you get this error message, please enter a different email address.
View and Manage Your Account
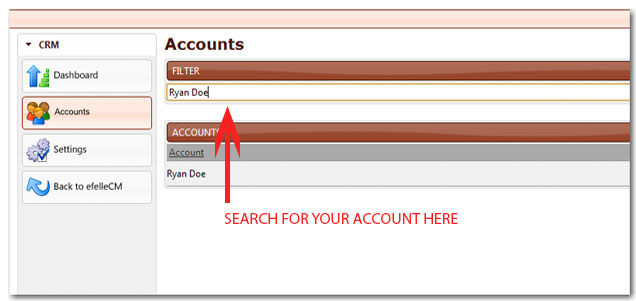
To view your account, please click into the account module. Find the search box labeled "Filter." Type in the account name you are searching and select the correct account below.
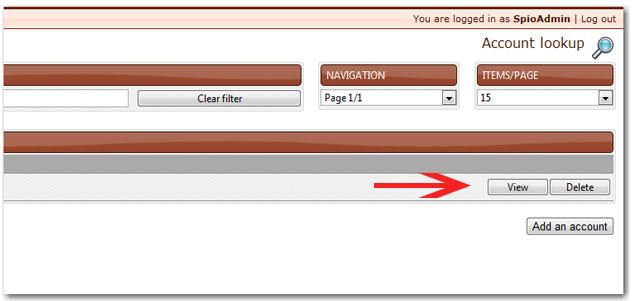
Once you have found the correct account, navigate to the right side of the page and select the "View" button. This will bring you into your account.
Now that you're in your account, you can update your settings. You can change your username, password, address, status, social media links and more.
Know Your Dashboard
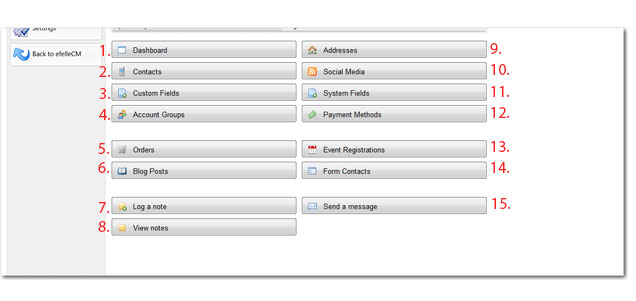
The dashboard is your home page. This is where you'll find everything you need to manage your account.
1. "Dashboard" will bring you back to this home screen to edit and update any of your information.
2. "Contacts" will allow you to add your preferred contact information.
3. "Custom fields" will allow you to add any field that will be further specific to your business, such as: gender, age or even third-party code.
4. "Account groups" will allow you to select the type of group your account is in.
5. "Orders" will allow you to review your order history.
6. "Blog post" will show all blogging activity, such as, comments or blog posts that the user has written.
7. "Log a note" allows you to document customer interaction.
8. "View notes" allows you to view all of your notes.
9. "Addresses" will allow to add and update your addresses.
10. "Social media" allows you to update your social media links, such as: Facebook, Twitter, LinkedIn, Yelp, YouTube and Google+.
11. "System Fields" are global field/value combinations that are added by request or have a logical purpose in order to complete back-end functionality. If a client would like a global identifier, on all accounts, such as: a student ID number, account number...etc. This is where we can add that, upon request.
12. "Payment method" allows you to enter payment credentials, such as credit card information.
13. "Event registration" shows you what events you have registered for in the past.
14. "Form contact"
15. "Send message" sends a message to whichever email address is listed in the customer's CRM.
Basic Account Information
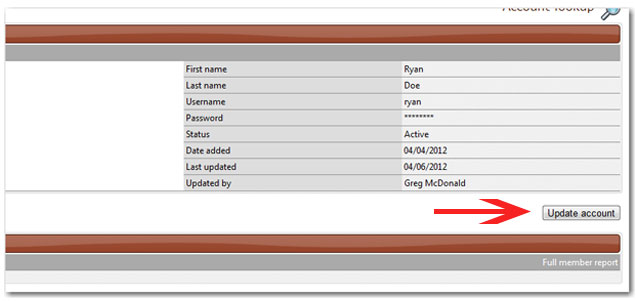
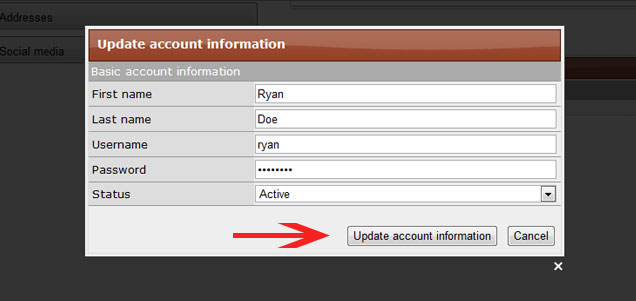
Click "Update account" to manage your basic account settings.
You will be able to update your name, password, username and status in this box. When you are finish select "Update account information" and all of you information will be saved.
Update Your Address
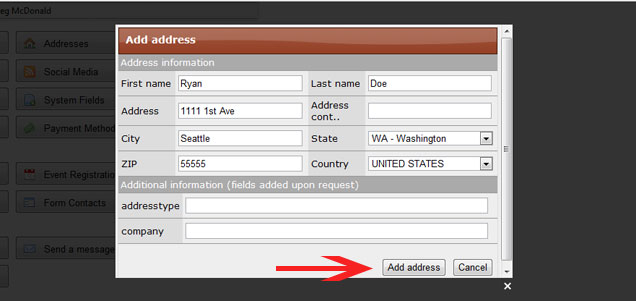
Select the "Addresses" button on your dashboard to update or add a new address. On the right side of the page a button called "Add address" will appear. Please select this button.
You can now update or add a new address. Please fill out all of the desired fields. Select if your address is commercial or residential, then select the "Add address" button. You will now have all of your information saved.
Log A Note
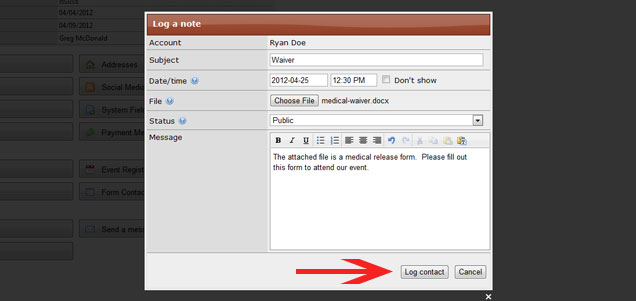
By logging a note, you will be able add interactions with customers. You can upload forms they need to fill out or just special instructions for an event.
Select the "Log a note" button on your dashboard to add a new note. A dialog box will appear. Inside, please give your note a subject. You have the option to set the date/time on the note. If you do not want this, please select the "Don't show" checkbox. By selecting "Choose file" you can upload any files or forms you need your customers to have. The next dropdown menu allows your note to be public or private. If a note is public, the user will see the note. Next add your text in the message area and select the "Log contact" button.
Update Your Contact Information
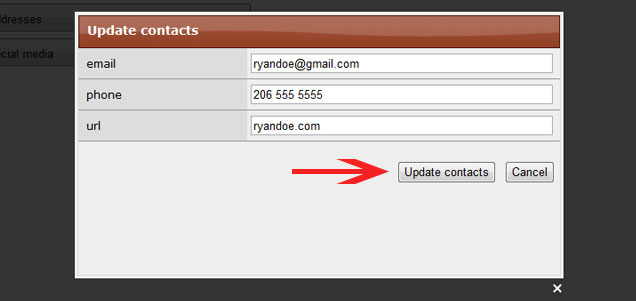
Select the "Contact" button in your dashboard to update your contact information. On the right side of the page a button called "Update contacts" will appear. Please select this button.
A dialog box will appear. Please enter any the following preferred contact information: email address, phone number and URL. Once done, select "Update contacts" and your information will be saved.
Update Your Social Media
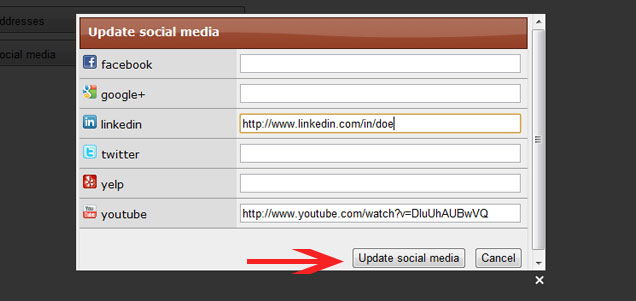
Select the "Social media" button in your dashboard to update your social medial links. On the right side of the page a button called "Update contacts" will appear. Please select this button.
A dialog box with all of your social media options will appear. Please fill in the desired social media links with the correct URL's. Here are examples of the proper format for each URL.
1. Facebook - http://www.facebook.com/ryan.doe
2. Google+ - https://plus.google.com/555555555555555555555/posts
3. LinkedIn - http://www.linkedin.com/in/doe
4. Twitter - https://twitter.com/#!/ryandoe
5. Yelp - http://www.yelp.com/biz/efelle-media-seattle-3
5. YouTube - http://www.youtube.com/watch?v=DluUhAUBwVQ
When you have the proper URL's for each desired social media platform, please select the "Update social media" button.
Update Your Payment Method
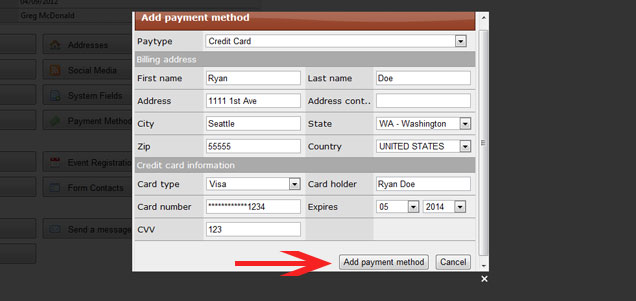
Select the "Payment Method" in your dashboard. On the right side of the page a button called "Add payment method" will appear. Please select this button.
Inside the dialog box your will be able to enter all of your payment information, for as many different credit cards as you want. Once you have all of the proper information entered, select the "Add payment method" button. Now all of your payment information is saved, safe and secured.
Send A Message
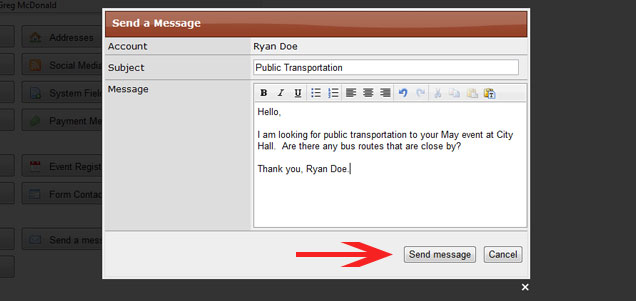
Select the "Send a message" button in your dashboard.
Inside the dialog box your will enter a subject, then the main content in the message section. After your message is complete select the "Send message" button. The message will be sent to whichever email address is listed in the customer's CRM.
Delete an Account
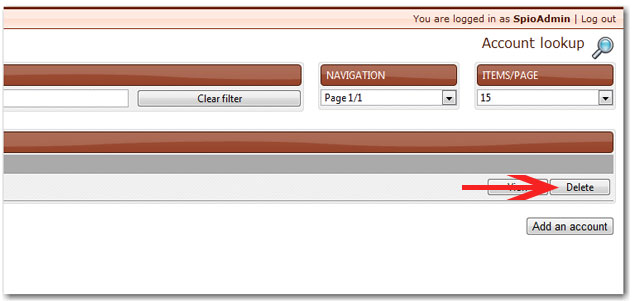
To delete an account, please follow the steps in "View an Account" to navigate to the desired account. Once you have found the account, on the right side of the page, select the delete button.
Next select "Remove account" and your account will be deleted.
Account Groups
Import Accounts
Settings
The Settings interface provides limited customization capabilities for the CRM module.
Maintain Contact Types
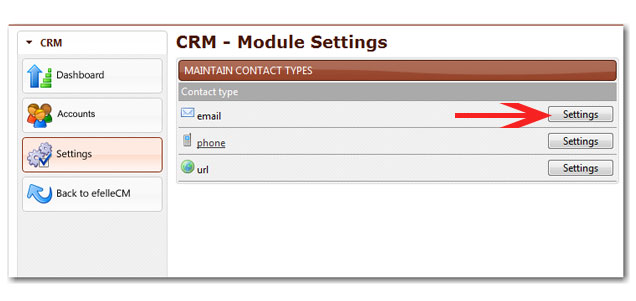
Contact Types includes account fields like: email, fax, phone, URL, etc...
To begin editing, please select the "Settings" button for your desired field.
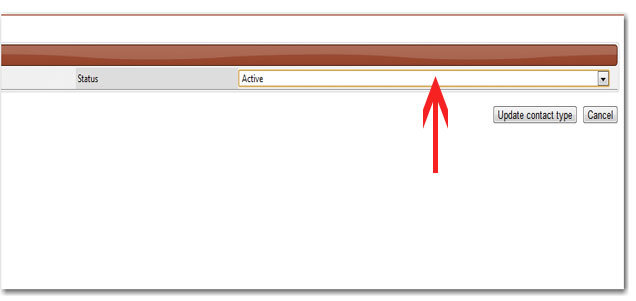
Selecting "Active" or "Inactive" gives you control to have this field appear in the account section of the CRM.
When you have selected either "Active" or "Inactive" on the dropdown menu, please select the "Update contact type" button.
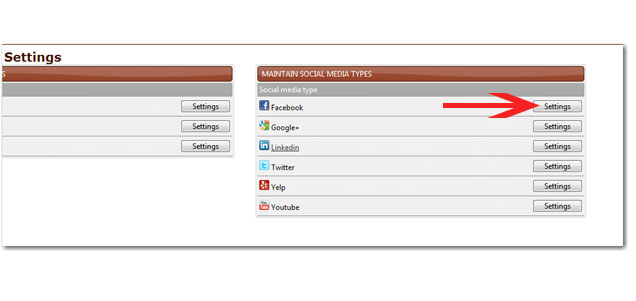
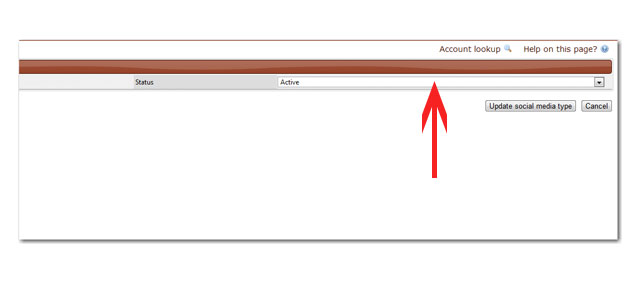
Maintain Social Media Types
To begin editing, please select the "Settings" button for your desired field.
Selecting "Active" or "Inactive" gives you control to have this field appear in the account section of the CRM.
When you have selected either "Active" or "Inactive" on the dropdown menu, please select the "Update contact type" button.
